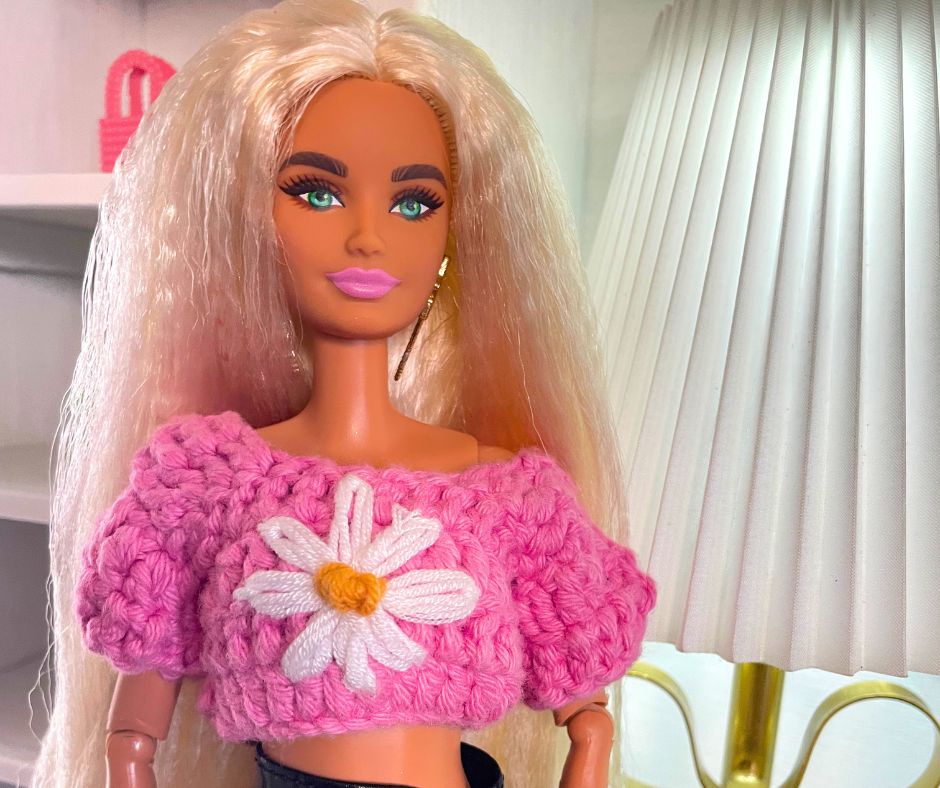
The simple square neckline of this Crochet Square Neck Daisy Blouse gives the blouse a pretty, feminine shape, while the crochet daisy embellishment adds an adorable floral touch. I love creating doll fashions because even the smallest pieces give me a chance to experiment with different colours, textures, stitches, and details. This blouse is also a fairly quick project once you understand how the panels are constructed, making it a lovely pattern to crochet in several different colours for your dolls.
Supplies You’ll Need
For this crochet doll blouse, you will need a small amount of crochet yarn or thread in your chosen colour, a crochet hook suitable for your yarn, scissors, and a yarn needle for weaving in the ends. You will also need a small amount of yarn for your daisy flower. Because doll clothes are so tiny, this is a wonderful project for using some of the pretty leftover yarn from your other crochet projects.
Crochet Square Neck Daisy Blouse Tutorial
The blouse is made by crocheting a front panel and back panel separately. You will shape the square neckline and sleeves directly onto each panel before joining the two pieces together.
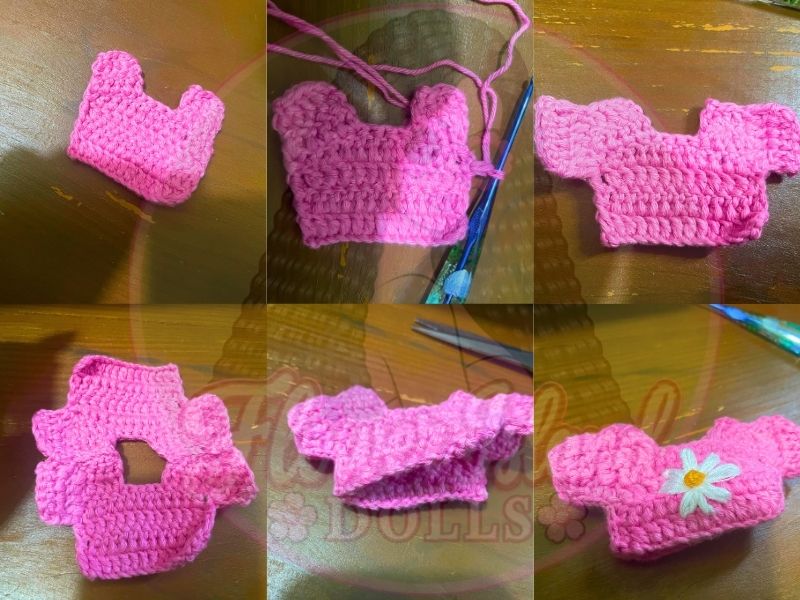
Begin the Front Panel
Make a slip knot.
Chain 16.
Row 1
Starting in the 4th chain from the hook, work 1 double crochet into every stitch across the row.
Row 2
Chain 2.
Turn your project.
Starting from the first stitch, work 1 double crochet into every stitch across.
Row 3
Chain 2.
Turn your project.
Starting from the first stitch, work 1 double crochet into every stitch across.
Row 4
Chain 2.
Turn your project.
Starting from the first stitch, work 1 double crochet into every stitch across.
Fasten off.
How to Make the Square Neck
Now that you have completed the four main rows, you can begin shaping the pretty square neckline.
Join your yarn at the 5th-to-last stitch at the top of the project.
Work 1 double crochet into each of those 5 stitches.
Chain 2 and turn your project.
Work 1 double crochet into each of the following 4 stitches.
Fasten off.
Turn your project so that the wrong side is facing you.
Repeat these steps on the opposite side of the top of the blouse, beginning from the outer end of that side.
Once both sections have been completed, the open space between them creates the blouse’s square neckline.
How to Crochet the Sleeves
Turn your project so that the stitches are positioned vertically.
Join your yarn at the edge of Row 4 on the blouse front.
Work 1 double crochet into each stitch until you reach the end of the row.
Chain 2 and turn your project.
Work 1 double crochet into each of the following 5 stitches.
Fasten off.
Repeat these same steps on the opposite side to create the second sleeve.
Fasten off and weave in your yarn ends.
Crochet the Back Panel
You’ve just completed the front panel of your Square Neck Daisy Blouse!
Now repeat the entire tutorial from the beginning to the end to create an identical back panel.
You should now have two blouse pieces: one front panel and one back panel.
Joining the Front and Back Panels
Place the front and back panels together, lining up the neckline, sleeves, underarms, and sides.
Use slip stitches to join the front and back panels together along the top of the sleeves on both sides.
Next, use slip stitches to join the panels together from the underarms of the sleeves and down the sides of the blouse.
Repeat on the opposite side.
Fasten off your yarn securely and weave in any remaining ends.
Turn the blouse right side out and gently shape the neckline and sleeves with your fingers.
Add the Daisy Flower
The final detail is the adorable crochet daisy! You can make a small daisy and attach it to the blouse to give your finished piece its pretty floral look.
Embroidered Daisy Video Tutorial: Follow my***YouTube Embroidery Daisy Tutorial***
Once your daisy is finished, position it wherever you like on the blouse and sew it securely in place using matching yarn or thread. You could add one statement daisy or experiment with several tiny flowers for an even more whimsical look.
Colour & Yarn Ideas
This little blouse would be beautiful crocheted in blush pink, baby blue, lavender, butter yellow, sage green, cream, or classic white. Try pairing a pastel blouse with a white-and-yellow daisy for a delicate springtime look, or crochet the blouse in a brighter colour and experiment with contrasting flowers. You can also make several versions and mix and match them with different doll skirts, shorts, jeans, and accessories.
Your Crochet Square Neck Daisy Blouse is now complete and ready for your doll’s wardrobe! I especially love how the simple crochet construction leaves room for you to make the design your own with different yarn colours and flower combinations. Keep visiting and browse the blog to download more free doll clothes sewing patterns and free doll clothes crochet patterns, and be sure to check out my beautiful dollhouse and my Barbie doll reviews for even more doll-sized inspiration and fun.